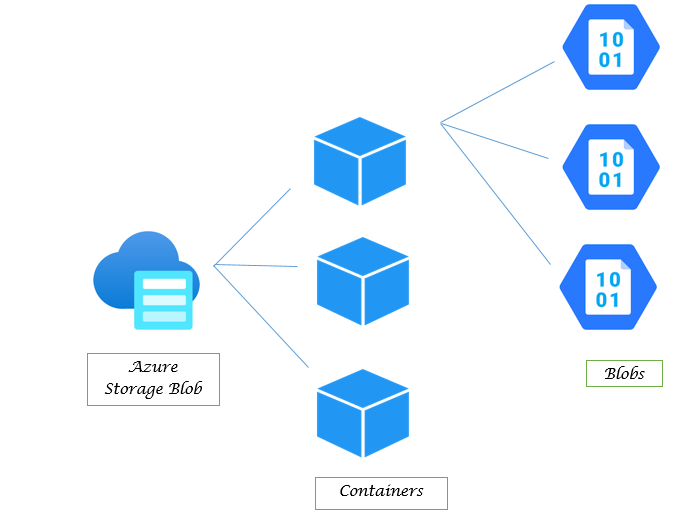
Storage accounts is one of the services in Microsoft Azure that provides cloud storage, where massive amounts of unstructured data can be stored. Unstructured data could be an image, text, video, or any binary data that doesn't adhere to a particular data model or definition.
In simple terms, a storage account is a place where you can store files in Azure and organize the files inside that container. Azure Blob Storage includes any number of containers – each of the containers in turn can store any number of blobs.
Why You Need Azure Blob Storage?
- Store Audios and videos
- Store any form of huge data - such as the logs of the applications
- Store backup data for disaster recovery
- Access it any time anywhere on the cloud
Simple Steps to create basic Azure Blob Storage
Do you have an Azure account created? If yes, proceed with the steps below to create an Azure storage account. If not, first create a free account using the link https://azure.microsoft.com/en-us/free and then continue.
Given below are the steps to create a storage account and the container inside it – via the Azure portal:
-
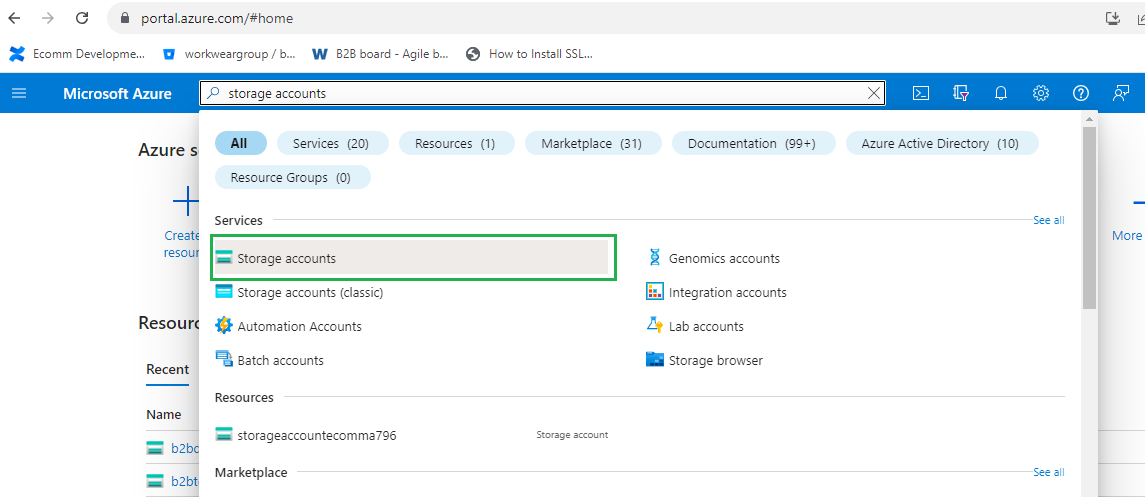
Type Storage account on the Azure portal search bar and select the Storage accounts option. Here’s what it should look like
-
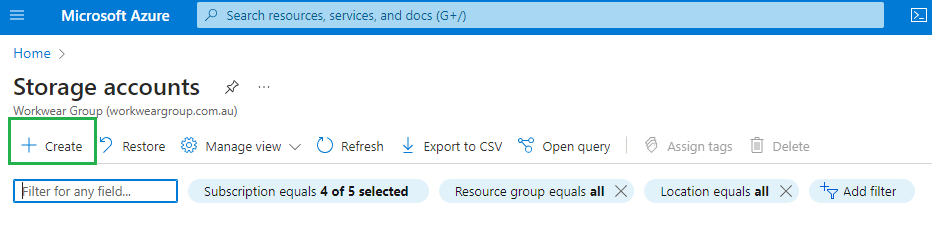
Click on the + Create button given below to create a new storage account
-
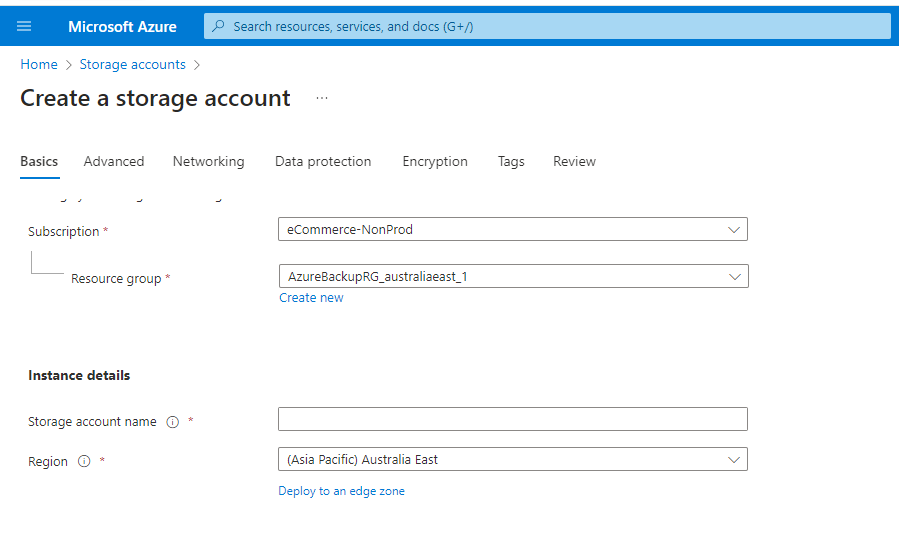
Enter the storage account name. The name must be unique across all existing storage account names in Azure. It must be between 3 to 24 characters and can contain only lowercase letters and numbers. Here, it’s important to make sure that the subscription and resource group under which you want to create the storage account are correct.
- Click on Review, and in the next page, click Create.
- Voila! Now, your storage account is created.
Creating a container inside the storage account
This is typically what you’d want to do next. Here’s how you go about it.
- Select the storage account in which you want to create the container.
-
Select the Containers option in the side menu bar as highlighted below.
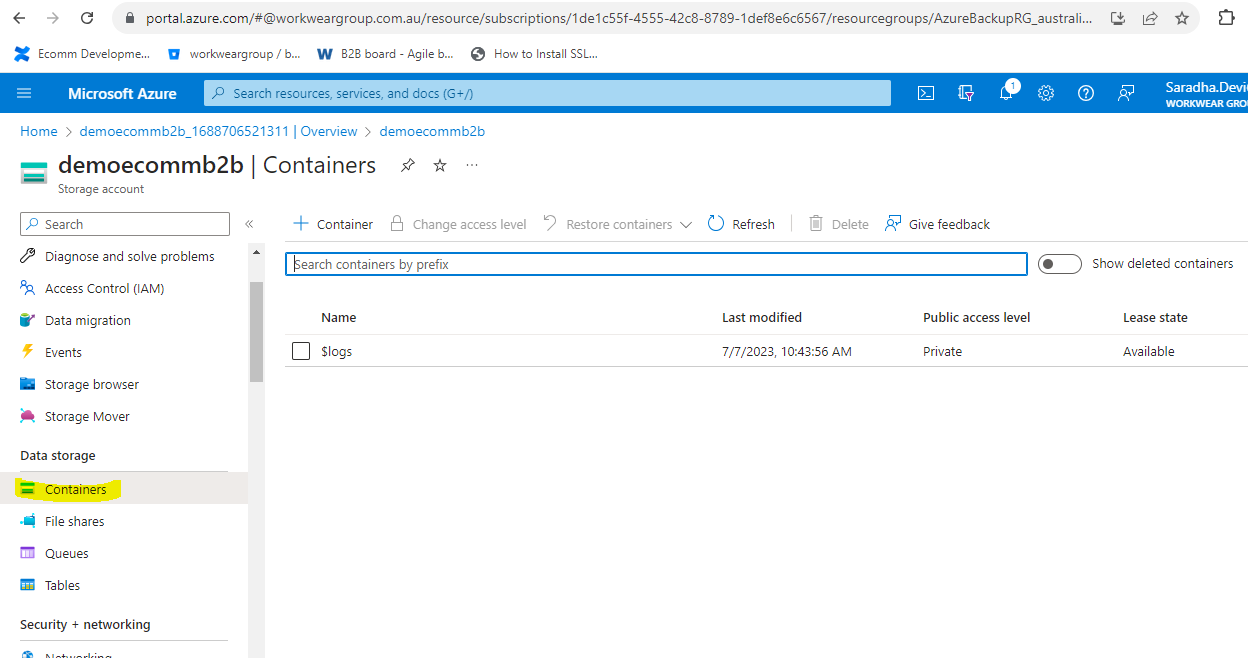
-
After that, click on +Container as shown below.
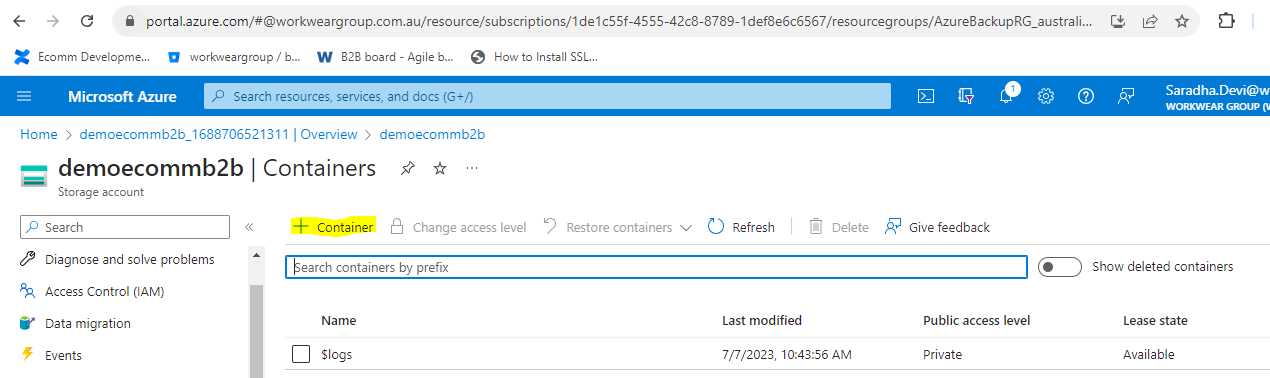
- Type a name for your new container from the pop-up. The container name must be lowercase, must start with a letter or number, and can include only letters, numbers, and the dash (-) character.
- Select Create to create the container.
Different methods of accessing Azure Blob containers
After creating a storage account and a container, it’s important to know the different approaches through which the Azure Cloud Blob Containers can be accessed. Worry not! Here’s a rundown of each approach:
Using Azure Sign-in Credentials
Do you have an Azure account created? And have you already created the subscription and container inside it? Then you’re on the right path, and you can start following the below approaches:
Storage Explorer Application
-
Microsoft Azure Storage Explorer Application is an App which can be downloaded from the Microsoft Azure site by going to Products>Storage>Storage Explorer
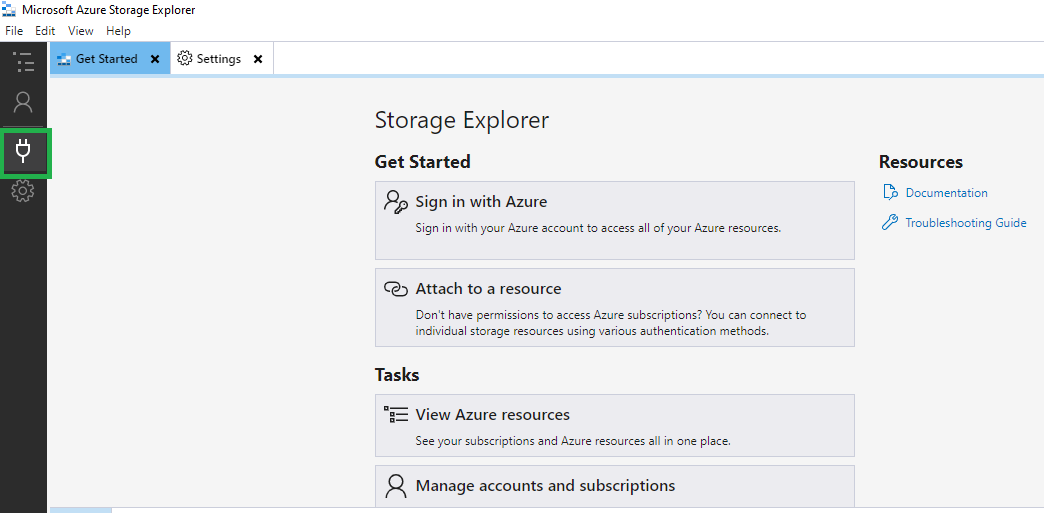
-
Click on icon that’s been highlighted above (top-left), and then select Subscription from the select resource pop-up that opens.
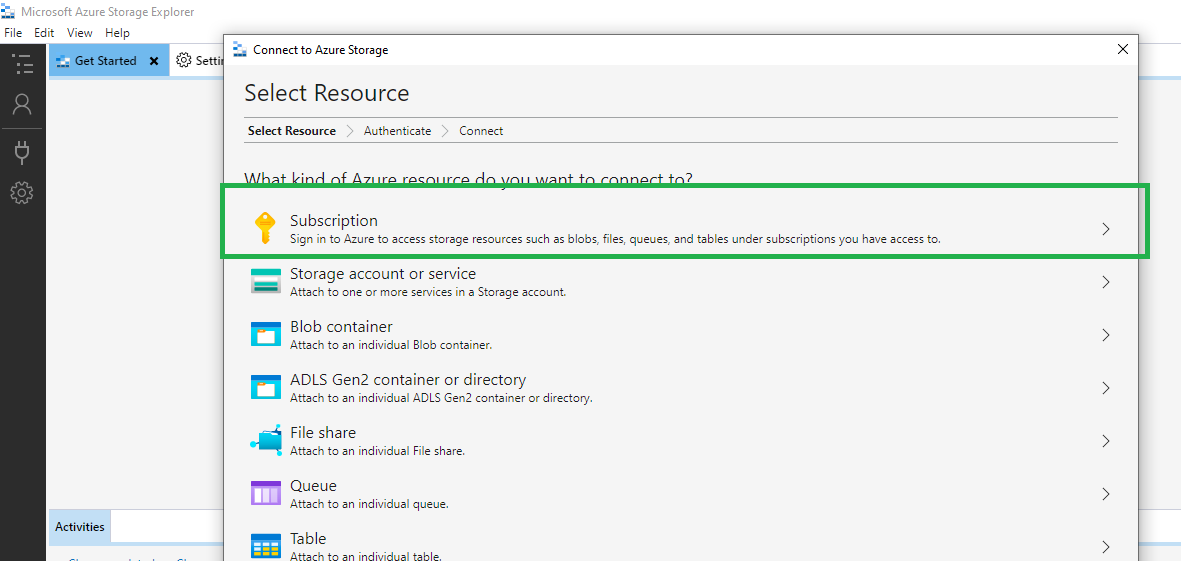
-
Select the Azure radio button to sign in with the global Azure.
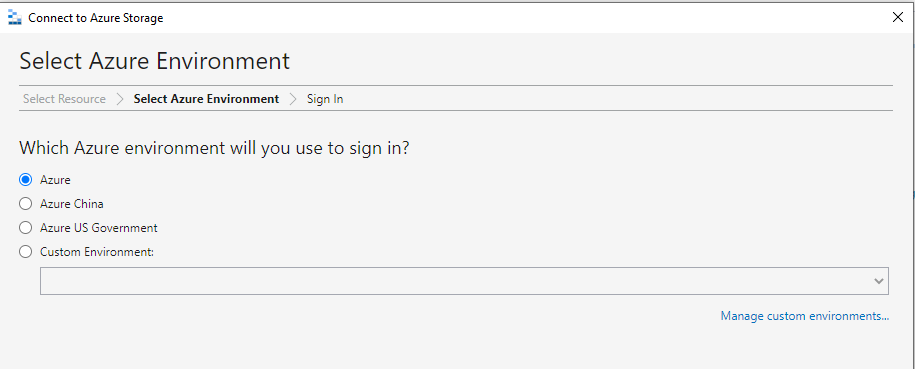
- Storage Explorer opens the Azure sign-in page in the web browser, where you would need to enter your Azure login details to sign in.
-
Once you’ve signed in, you can view all the subscriptions in the storage explorer app.
-
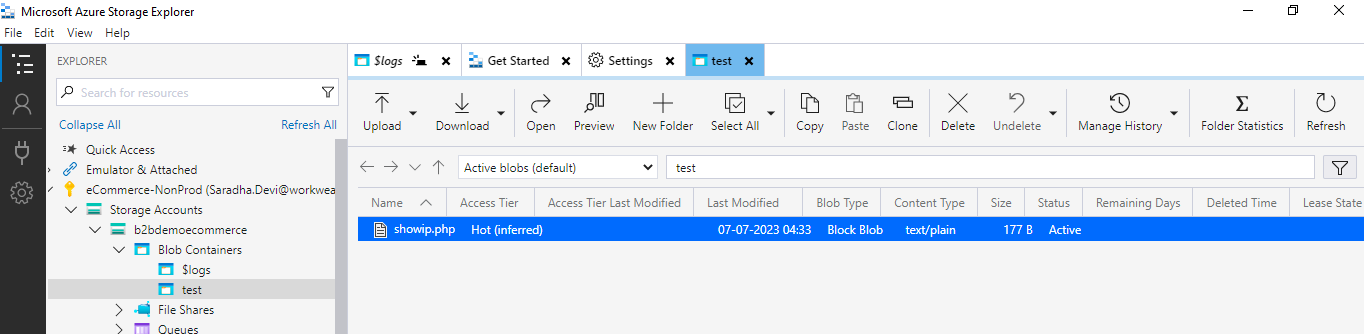
Now, select the subscription and expand the storage accounts option to select the container in which you have placed all the blobs.
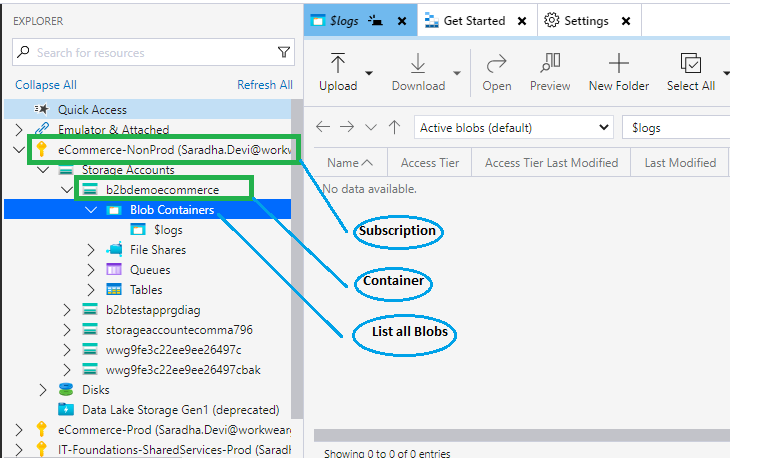
-
In order to upload files - Click on Upload and select Upload File from the dropdown
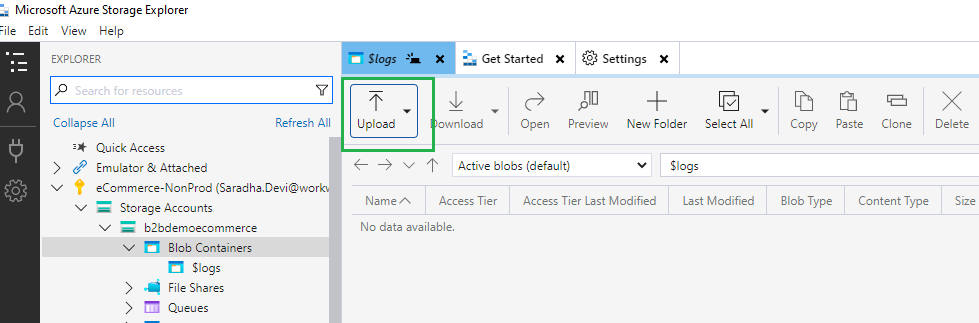
-
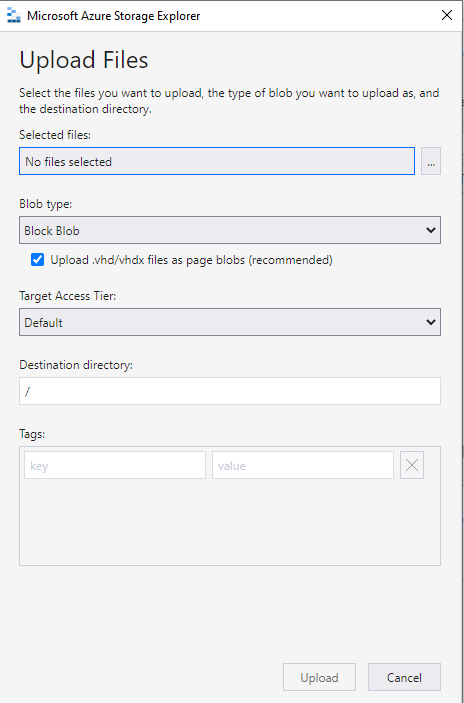
An upload prompt opens (like in the picture below). Now, select the file from your system that you want to upload, Select the blob type to be Block Blob, and then click Upload
-
Select the files and click on Upload to view list of files under the selected container.
- To download the blobs, select the Download.
Using az commands:
- Login with az login
- Make sure the storage account and container have been created.
- Use the command below to upload the file:
az storage blob upload \ --account-name\ --container-name \ --name myFile.txt \ --file myFile.txt \ --auth-mode login - To list the files in the container, use the command that follows:
az storage blob list \ --account-name\ --container-name \ --output table \ --auth-mode login
Using Account name and Account key
How can you access the blob storage if you don’t have Azure credentials, but have only the Account name and Account key?
No problem! You can still view and access the blobs. In fact, there are a few approaches to do so.
Given below are the approaches for you to continue with:
Storage Explorer Application
-
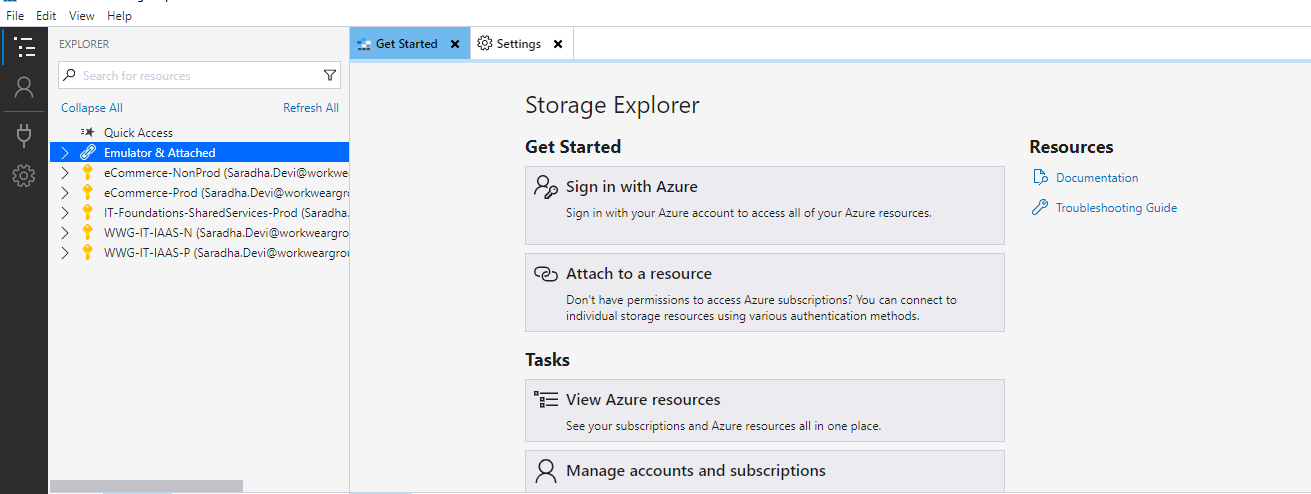
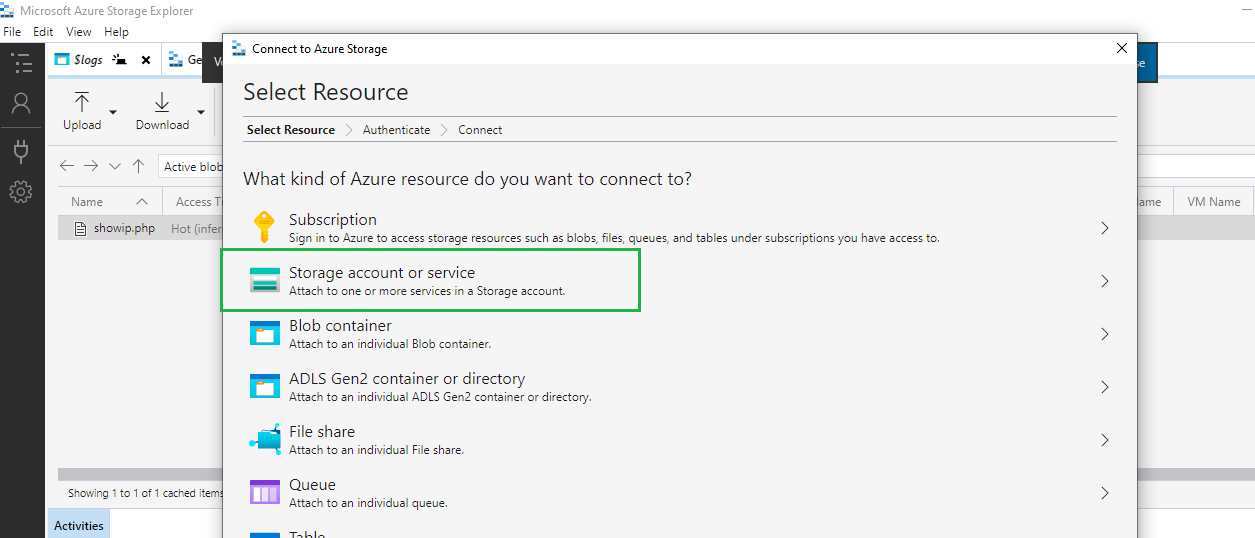
Select Storage account or service from the select resource pop-up, after clicking the plug icon
-
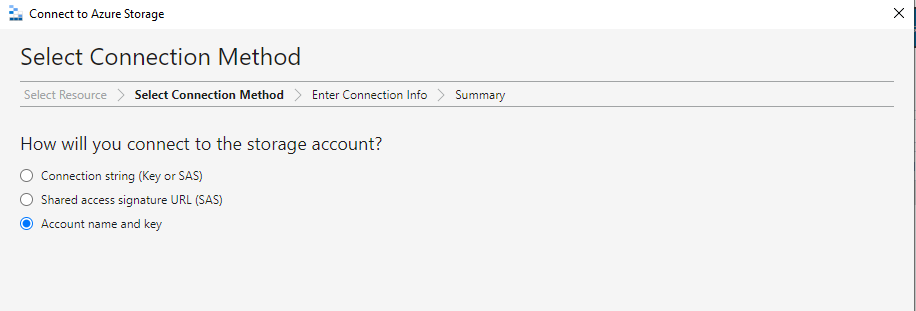
Select Account name and key from the next pop-up that opens.
-
Enter the account name, account key, and display name (to be displayed in the Storage Explorer App) in the pop up which opens

-
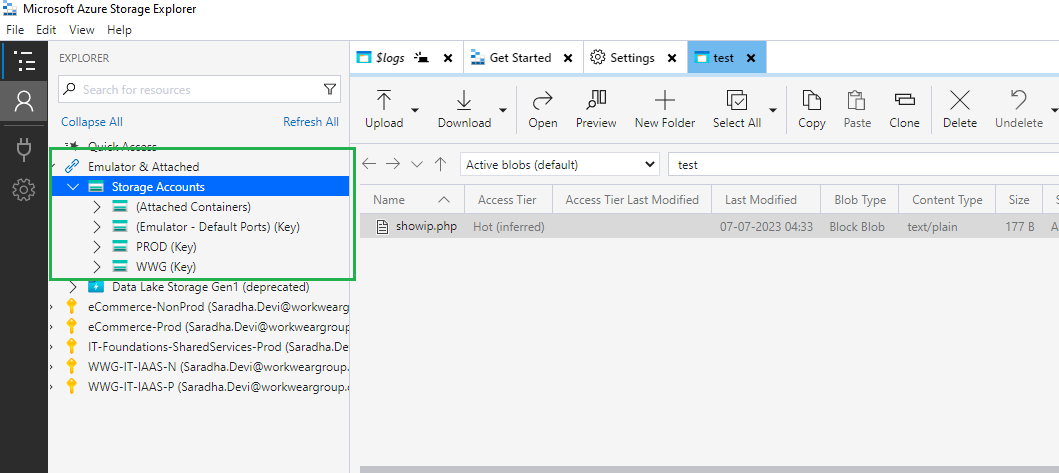
Once you have added all the details, the summary page opens up with the details you entered. After clicking OK in the storage explorer side menu bar, expand the Emulator and Attached and Storage Accounts options as given below. With this, the storage accounts to the respective account key and account name will be displayed.
Using Azure SDKs for programming languages
With Python
If you have the Python 3.6+ version and want to access the files from the python script, you are at the right place!
- Install this package to access libraries related to Azure Blob Storage:
pip install azure-storage-blob azure-identity -
Now, use this Python script to upload blobs:
from azure.storage.blob import BlobServiceClient storage_account_key = "ACCOUNT_KEY” storage_account_name = "ACCOUNT_NAME" connection_string = "DefaultEndpointsProtocol=http;AccountName=ACCOUNT_NAME;AccountKey=ACCOUNT_KEY;BlobEndpoint=http://127.0.0.1:10000/ACCOUNT_NAME;QueueEndpoint=http://127.0.0.1:10001/ ACCOUNT_NAME;TableEndpoint=http://127.0.0.1:10002/ACCOUNT_NAME" container_name = "CONTAINER_NAME" def uploadFileToBlobStorage(file_path,file_name): blob_service_client = BlobServiceClient.from_connection_string(connection_string) blob_client = blob_service_client.get_blob_client(container=container_name, blob=file_name) with open(file_path,"rb") as data: blob_client.upload_blob(data) print(f"{file_name} Uploaded Successfully.") uploadFileToBlobStorage("FILE_PATH_FROM_YOUR_SYSTEM","FILE_PATH_OF_AZURE_STORAGE_BLOB") -
To list all files that are present in the container of the storage account, use the below script:
                connection_string = "DefaultEndpointsProtocol=http;AccountName=ACCOUNT_NAME;AccountKey=ACCOUNT_KEY;BlobEndpoint=http://127.0.0.1:10000/ACCOUNT_NAME;QueueEndpoint=http://127.0.0.1:10001/ ACCOUNT_NAME;TableEndpoint=http://127.0.0.1:10002/ACCOUNT_NAME"
                container_name = "CONTAINER_NAME"
                service = BlobServiceClient.from_connection_string(conn_str=connection_string)

                from azure.storage.blob import ContainerClient

                container = ContainerClient.from_connection_string(conn_str=connection_string, container_name="CONTAINER_NAME")

                blob_list = container.list_blobs()
                for blob in blob_list:
                    print(blob.name + '\n')
With PHP
If you have the 5.6+ version of PHP and want to access the files from the PHP script, just follow these steps
- Add the library given below in composer.json file under require
{ "require": { "microsoft/azure-storage-file": "*" } } -
Use this PHP script to upload blobs:
createBlobService($connectionString); $content = fopen("FILE_TO_UPLOAD", "r"); $blob_name = "BLOB_NAME"; try { //Upload blob $blobProxy->createBlockBlob("CONTAINER_NAME", $blob_name, $content); } catch(Exception $e){ $code = $e->getCode(); $error_message = $e->getMessage(); echo $code.": ".$error_message."
"; } -
Last but not the least, here’s the script to list all files present in the container:
                createBlobService($connectionString);


                try	{
                    // List blobs.
                    $blob_list = $blobRestProxy->listBlobs("CONTAINER_NAME ");
                    $blobs = $blob_list->getBlobs();

                    foreach($blobs as $blob)
                    {
                        echo $blob->getName().": ".$blob->getUrl()."
";
                    }
                }
                catch(Exception $e){
                    $code = $e->getCode();
                    $error_message = $e->getMessage();
                    echo $code.": ".$error_message."
";
                }
Mastered with Azure Blob Storage! What next?
It’s the end of the line for this comprehensive guide on Azure Blob Storage. Ideally, this article has helped you create and access the blobs in your Azure storage account.
In addition to the Azure services, Nalashaa also has expertise in multiple cloud engineering services, using platforms such as AWS, Google cloud platform, and more – across multiple industries. Reach out to our experts at info@nalashaa.com for more details and choose the path that suits you best.